I will try to explain how to implement SAML authentication method using Authentik. To make this guide simple and short, I will not explain about Nextcloud and Authentik installation.
if you need guide on Authentik Installation, here it is

let's get started
Prerequisites
- Nextcloud Installation
https://cloud.example.com - Authentik Installation
https://auth.example.com
On Authentik
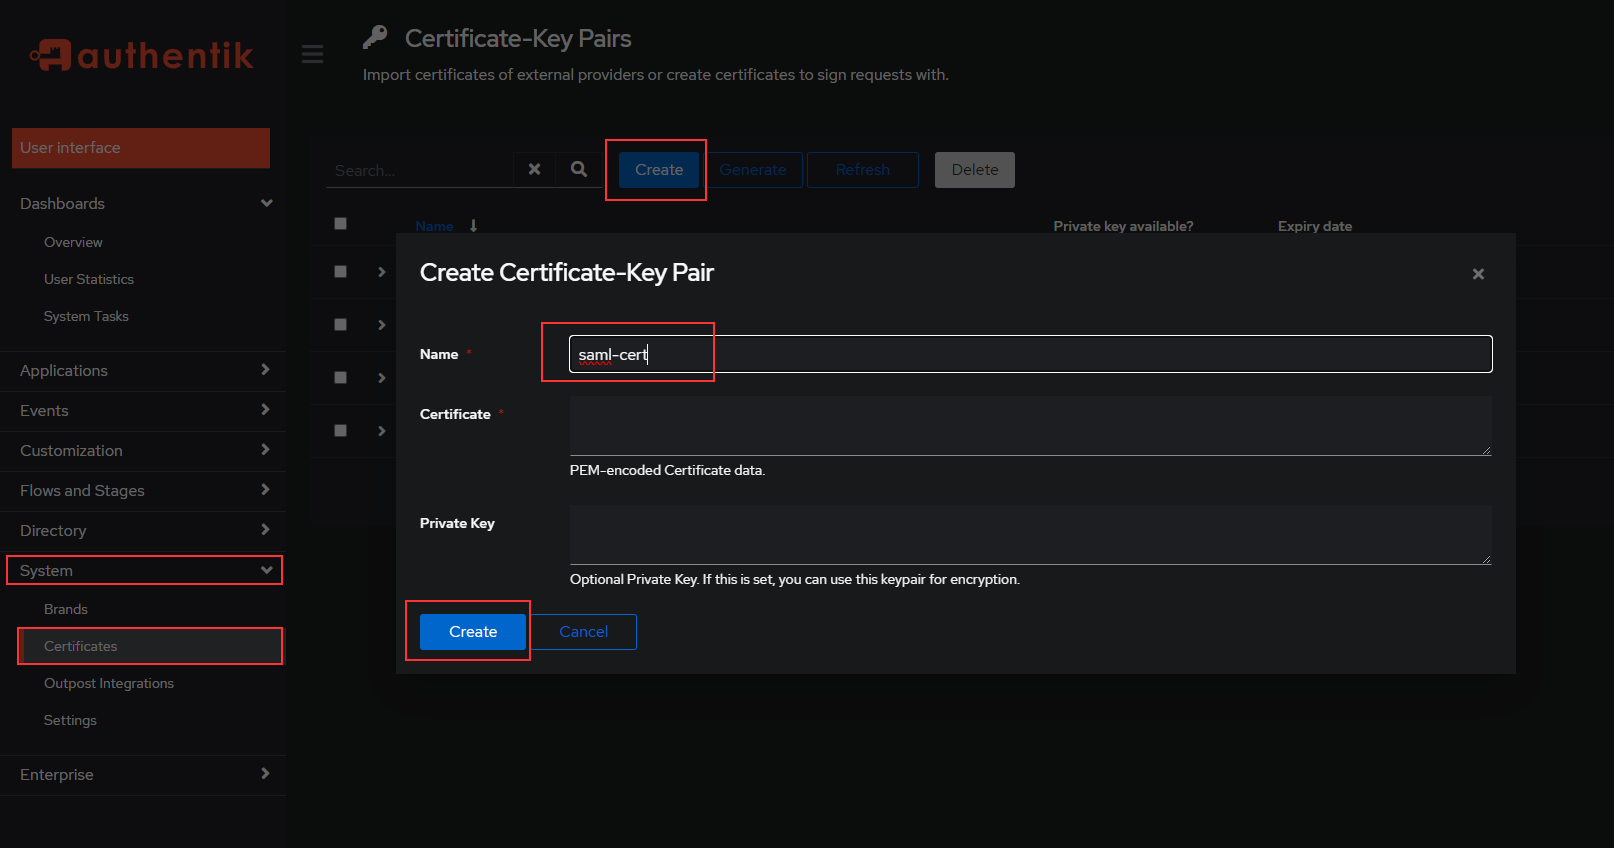
Download Self-signed Certificate
login to your authentik installation and go to admin panel and download the selfsigned certficate and private key. you can always create or generate new certificates. for this example I will be using self signed one
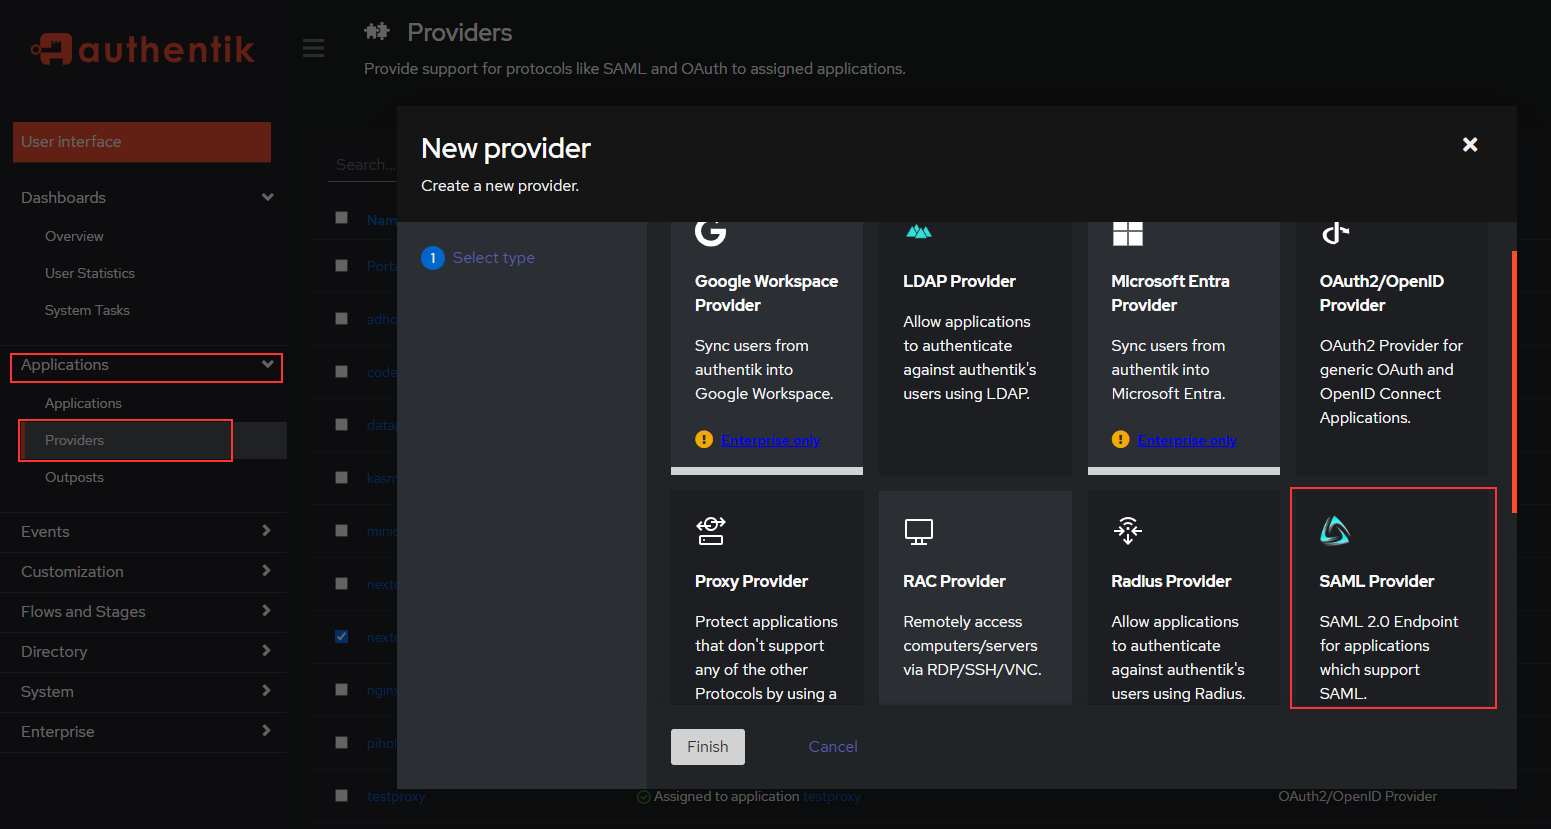
Create SAML Provider
Now go to Provider tab and create a SAML Provider with below details.
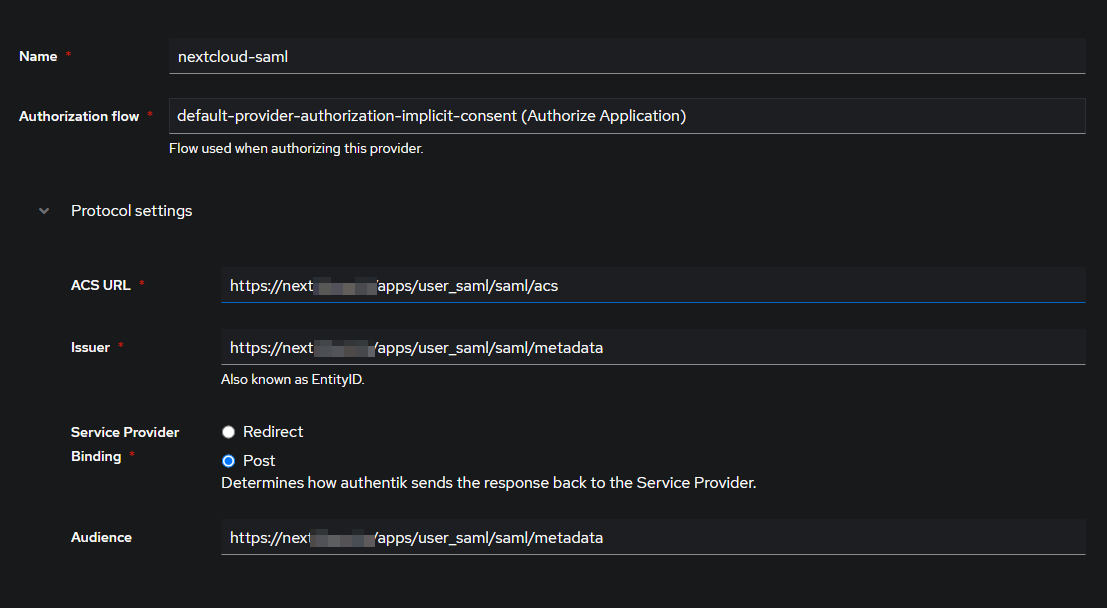
- Name:
nextcloud-saml - ACS URL:
https://cloud.example.com/apps/user_saml/saml/acs - Issuer:
https://cloud.example.com/apps/user_saml/saml/metadata - Service Provider Binding:
POST - Audience:
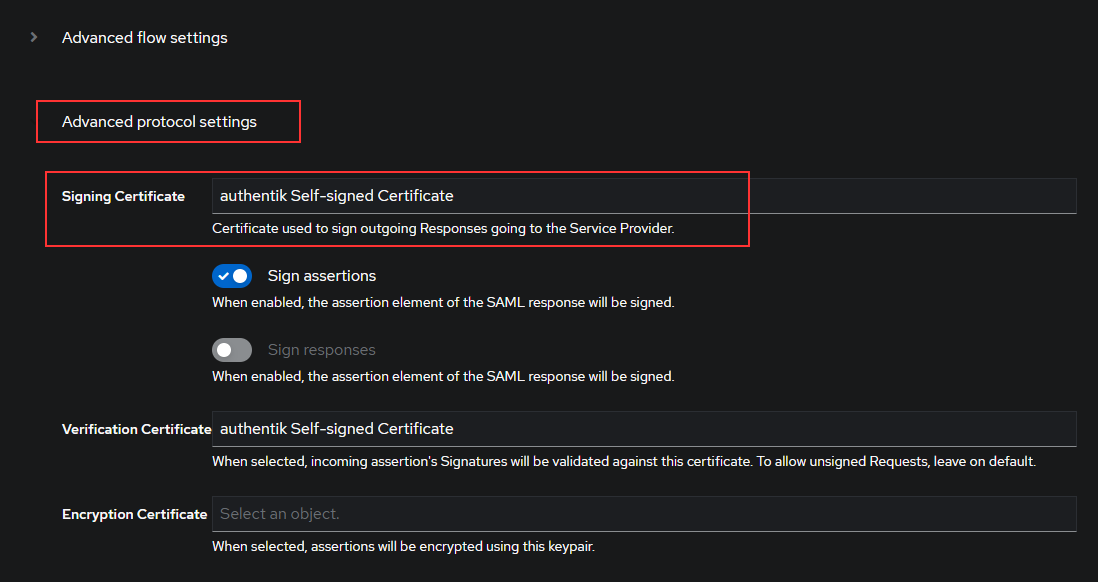
https://cloud.example.com/apps/user_saml/saml/metadata - Signing certificate:
authentik self-signed certificate - Verification certificate:
authentik self-signed certificate - Property mappings: select all entries (default)
- NameID Property mapping:
User ID - the rest of the fields you can leave as they are
Create Nextcloud Application
Now create an Application with provider nextcloud-saml
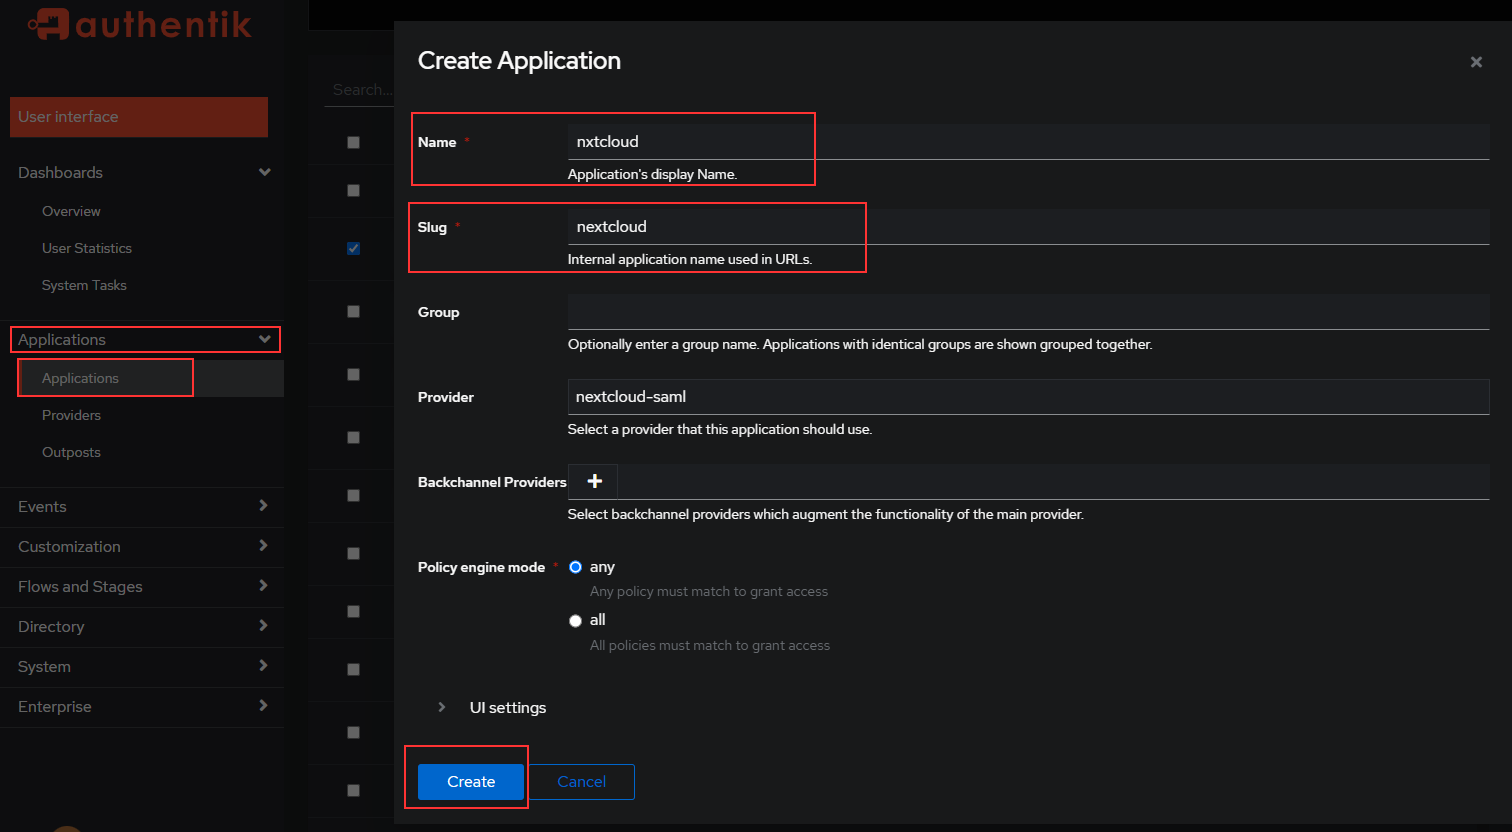
- Name:
Nextcloud - Slug:
nextcloud(do not change this) - Provider:
nextcloud-saml
On NextCloud
HTTPS Redirect Settings
Before we make any changes on Nextcloud, make sure that the nextcloud instance is using https redirect pattern. Add the line 'overwriteprotocol' => 'https' to your Nextcloud’s config/config.php (see Nextcloud: Reverse Proxy Configuration)
SAML Configuration
go to Settings Locate the SSO & SAML authentication section in the left sidebar. and add below variables.
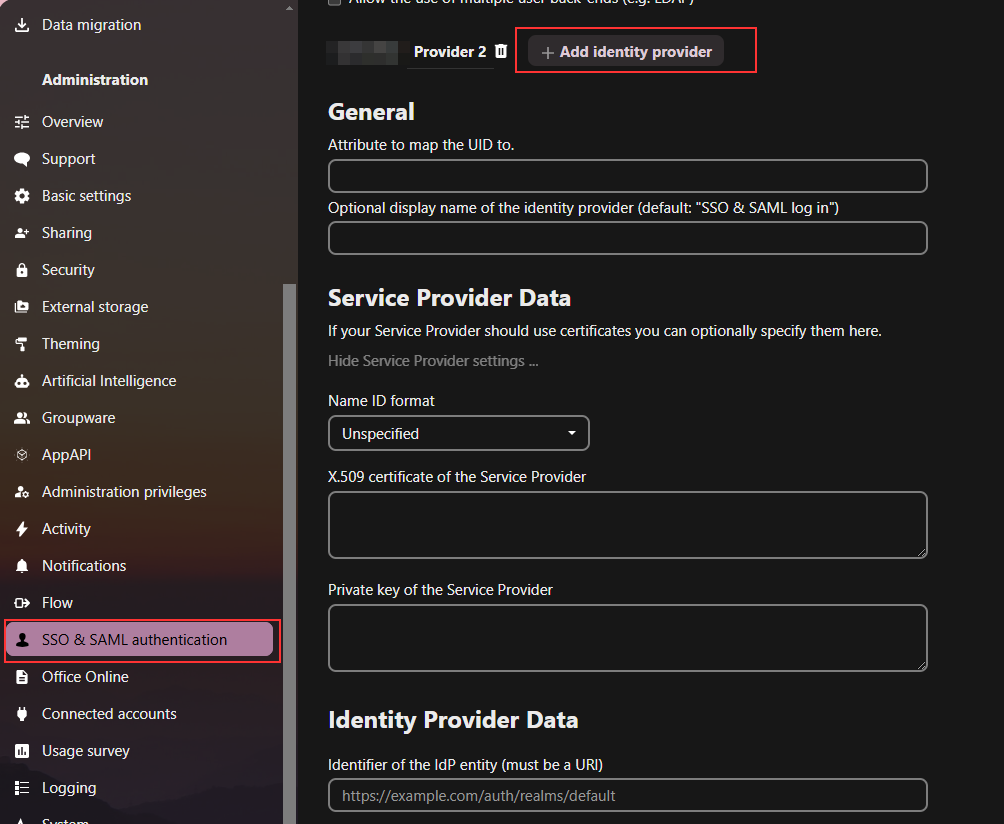
- General
- Attribute to map UID to:
http://schemas.goauthentik.io/2021/02/saml/username - Display name of Identity Provider:
Authentik SSO - Service Provider Data
- Choose
X509 subject nameand insert theauthentik self-signed certificatecertificate and private key you downloaded from Authentik - Identity Provider Data
- Identifier of the IdP:
https://cloud.example.com/apps/user_saml/saml/metadata - URL Target of the IdP where the SP will send the Authentication Request Message:
https://auth.example.com/application/saml/nextcloud/sso/binding/redirect/ - URL Location of IdP where the SP will send the SLO Request:
https://auth.example.com/if/session-end/nextcloud/ - URL Location of SLO Response: (empty)
- Public X.509 certificate of the IdP: insert the certificate you downloaded from
authentik self-signed certificate - Attribute mapping
- Attribute to map the displayname to:
http://schemas.xmlsoap.org/ws/2005/05/identity/claims/name - Attribute to map the email address to:
http://schemas.xmlsoap.org/ws/2005/05/identity/claims/emailaddress - Attribute to map the users groups to:
http://schemas.xmlsoap.org/claims/Group
Finally, after you entered all these settings, a green Metadata valid box should appear at the bottom. Note that there is no Save button, Nextcloud automatically saves these settings.
Let's try it
Open a new incognito tab and go to https://cloud.example.com you should see the authentik page presented.
There it is, now you a Nextcloud installation with SAML authentication ;)